Saturday, May 3, 2008

The Sharpening Project


The Sharpening Project
Originally uploaded by gezelle

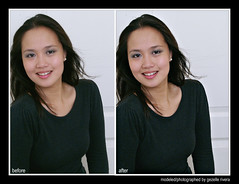
I have read about manny librodo's post-processing style a few months ago, but never got the chance to try it until this morning. even just after applying the first two steps from his sharpening method, i was already very happy with the results and truly liked what i was seeing. To appreciate the difference, you will need to view the image in full size.

Here are the detailed steps taken in order to achieve the sharp image on the right:
1. Background copy
2. USM 18-40-0
3. USM 150-.3-0
4. Edit>Fade USM 100% in Darken Mode
5. USM 150-.3-0
6. Edit>Fade USM 50% in Lighten Mode
7. Flatten image

Since what i own is an entry-level dslr, i have learned to accept that my photos will never be as sharp as those produced by other dslrs, especially canon. Even when i would shoot at my lens' sweet spot, i would often observe that some sharpness (or "crispness") in the photos was lacking. Apparently, this was a common problem with most digital images. But luckily for us, Adobe Photoshop deals with this dilemma quite effectively by providing us with the USM Tool (Unsharp Masking Tool), accessible under the "Filter > Render" Menu.

I could not fully comrepehend what goes on technically during the Unsharp Masking process, but I really love the results. You have to try this to believe, and do not hesitate any bit! The entire "USTe" set which was taken using a Canon IXUS point-and-shoot was post-processed to apply this sharpening technique.

To understand more about the USM Tool, you may read this article from photocritic.

Many thanks to Sir Manny for sharing his technique to the world!

If this article was helpful to you, please let me know. God bless and happy shooting!
Friday, May 2, 2008

Layout Study #1


Layout Study 1
Originally uploaded by gezelle

Because I could not install Adobe InDesign with my current OS, I decided to go ahead and create a photo layout using Adobe Photoshop CS3 anyhow, even though I was aware that InDesign or Elements can do the job much easier and a lot faster. This is something I had wanted to do for a long time now and I did not want to delay any longer.

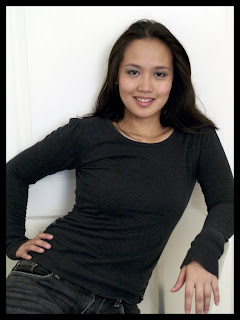
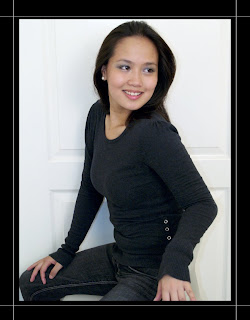
For my first photo layout study, I chose images from this Multiply set which is a recent addition to a self-portrait series I'm doing. I really thought it would be difficult to use CS3 for this task, but it turned out to be a little less challenging than I thought. I guess I'm a little lucky today!

Here are some technical specifics which I'm writing here so that I can remember what it's like to do this someday :) Please feel free to make suggestions and/or provide comments. I'm still a beginner and I welcome any help I can get. I'm hoping that you'll learn a thing or two as well.

To come up with this layout, the following layers had to be used:
1. layer for the large photo on the left
2. layer for the black vertical bar on the right
3. layer for the top photo
4. layer for the center photo (next layer from the top)
5. layer for the bottom photo (topmost layer)

The smaller photos were added using the "File > Place" command and were resized, rotated using the inherent transform control bar. before placing the three smaller photos in this layout, they were individually edited and added with an outline border (see previous post on this) first.

When the layout was complete, the layers were merged by the "Layer > Flatten Image" command. Curves were adjusted as a whole and the photo was sharpened using the "Filter > Sharpen" tool before I exported using the "Save for Web" option. All image adjustments were made in sRGB, 16Bits/Channel mode.

Do let me know if this post was helpful in any way and whether you liked this photo layout or not.

Thanks and God bless!

about borders


here are three different ways to add a border to your images using photoshop:

Colored Border
1. Open the image.
2. Select the entire image by hitting ctrl+A
3. Go to Edit > Stroke.
4. Select the color of your border.
5. Select the size of your border. I have used 40px for the sample above.
6. Click OK.

Outlined Photo
1. Use eyedropper and choose outer border color.
2. Go to Layer > Duplicate layer.
3. Select the new layer and then go to Layer > Layer Style > Stroke.
4. Choose size of inner frame. Sample here was set to 1px.
5. Choose color then hit OK.
6. Select the original layer. Go to Image > Canvas Size.
7. Click on the Relative checkbox. Choose size. For this example, I chose 40px.
8. Hit OK.


Variation of the Outlined Photo
1. Follow steps 6 to 8 from the previous method. Ignore steps 1 to 5.
2. Select the Line Tool and choose 1px for the line size.
3. Select an appropriate color for the line.
4. Draw 4 different lines that will serve as the border for the photo.

That's it. If you like this tutorial or have questions, just send me a message.

Thanks, folks and have a good day!

Flickr Slideshow